If you’ve recently purchased a Smart Rocket SIM, completing your Smart Rocket SIM registration is one of the first things you need to do before enjoying unlimited data, calls, and text services. Under the SIM Registration Act (Republic Act No. 11934) in the Philippines, all Smart SIM cards—including Smart Rocket SIM—must be registered with the mobile network provider.
Fortunately, the Smart Rocket SIM registration process is straightforward and can be completed online using the official Smart SIM Registration Portal or the Smart App. You only need your Smart Rocket SIM, a valid government-issued ID, and a few personal details to get started.
In this guide, you’ll learn:
- What Smart Rocket SIM is
- Who needs to register
- Registration requirements
- Accepted valid IDs
- Things to prepare before registration
- Official registration methods
- Common questions and helpful tips
Let’s get started.
If you’re looking for more step-by-step guides on Philippine government services and online portals, visit RegisterInfoPH for the latest tutorials and updates.
What Is Smart Rocket SIM?
Before using the SIM for calls, texts, or data, you must complete Smart Rocket SIM registration as required by Philippine law. Smart Rocket SIM is a prepaid data SIM offered by Smart Communications. It is designed for users who need reliable internet access without being tied to a monthly contract. Unlike regular prepaid SIMs, Rocket SIM is primarily focused on mobile internet and supports Smart’s data promos, including selected Unlimited Data offers.
Many people use Smart Rocket SIM for:
- Home Wi-Fi devices
- Pocket Wi-Fi
- Smartphones
- Tablets
- Remote work
- Online classes
- Video streaming
- Gaming
Since it operates on the Smart network, Rocket SIM can access Smart’s nationwide 4G LTE and 5G coverage in supported areas.
Related articles : Smart SIM Registration Philippines 2026 : Complete Guide
Globe Plan Renewal (2026): Complete Online Renewal Guide for Globe Postpaid
How to Register Smart Rocket SIM Online (2026)
Now that you have prepared the required documents and understand the registration requirements, the next step is to complete your Smart Rocket SIM registration through the official Smart registration channels.

Smart allows subscribers to register online using the official Smart SIM Registration Portal or the Smart App. Both methods are free and only take a few minutes if you have all the required information ready.
The quickest way to register your Smart Rocket SIM is through the official Smart SIM Registration website. You can complete the process using your smartphone, tablet, laptop, or desktop computer.
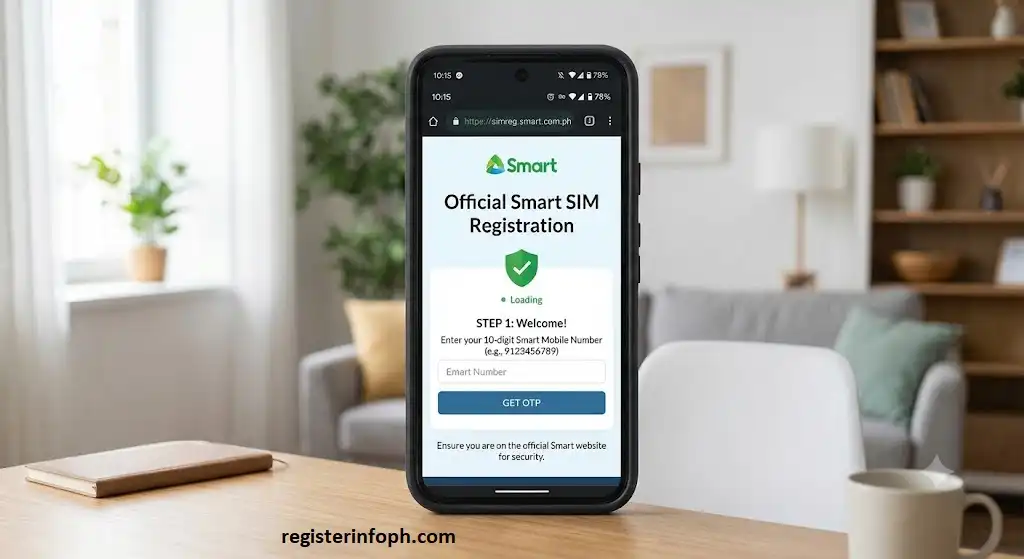
Step 1: Visit the Official Smart SIM Registration Portal
Open your preferred web browser and visit the official Smart SIM Registration Portal.
Use only Smart’s official website to protect your personal information and avoid phishing or fake registration pages.
Step 2: Enter Your Smart Rocket SIM Number
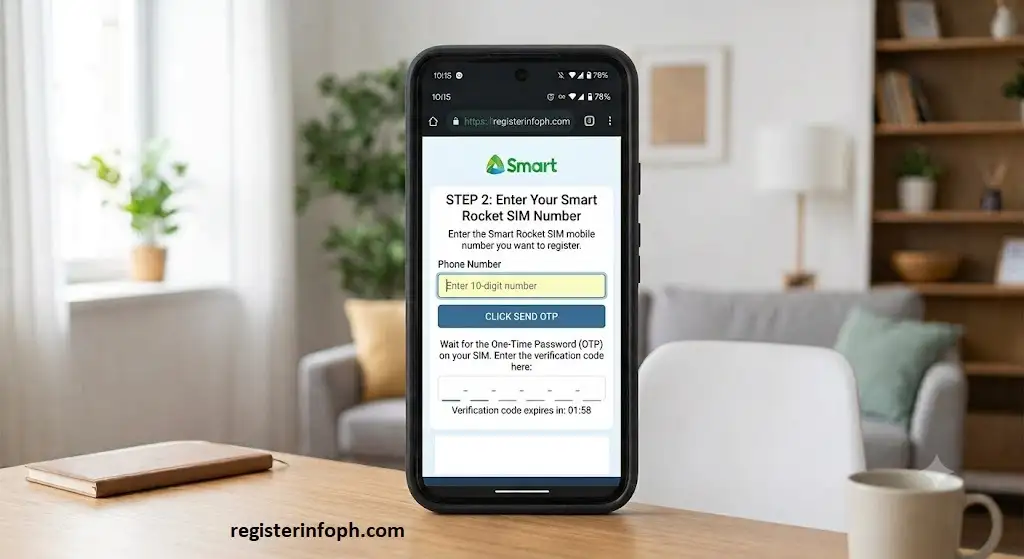
Enter the Smart Rocket SIM mobile number that you want to register.
After entering your number:
- Click Send OTP
- Wait for the One-Time Password (OTP)
- Enter the verification code before it expires
The OTP confirms that you have access to the SIM card.
Step 3: Fill Out Your Personal Information
Once your number is verified, complete the registration form by providing your personal details.
Typical information includes:
- Full Name
- Date of Birth
- Gender
- Nationality
- Complete Residential Address
- Mobile Number
- Email Address (if available)
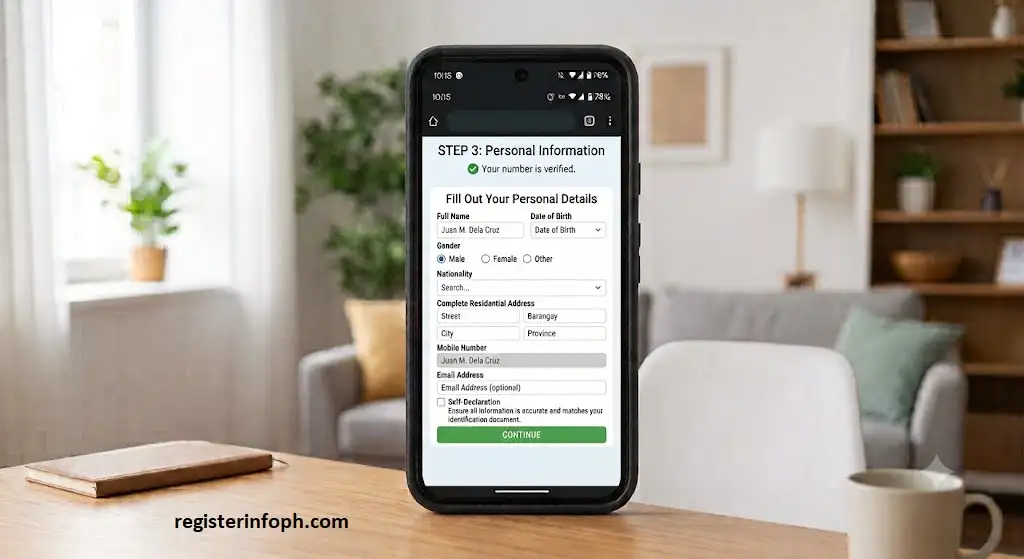
Ensure all information is accurate and matches your identification document.
Step 4: Upload Your Valid Government-Issued ID
Next, upload a clear image of your valid ID.
To avoid verification issues:
- Upload the original document.
- Ensure the text is readable.
- Avoid blurry or cropped images.
- Make sure the ID has not expired.
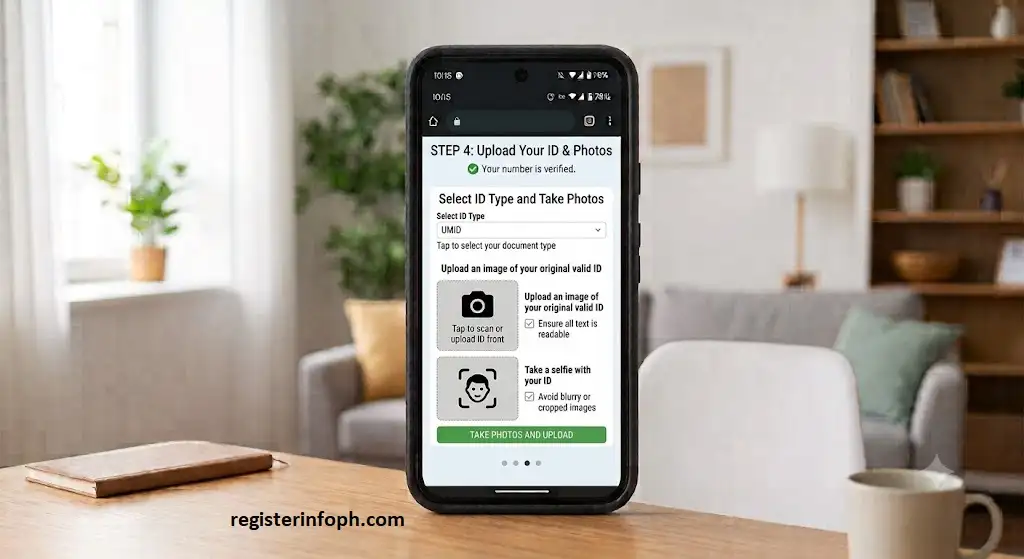
A clear photo helps speed up the verification process.
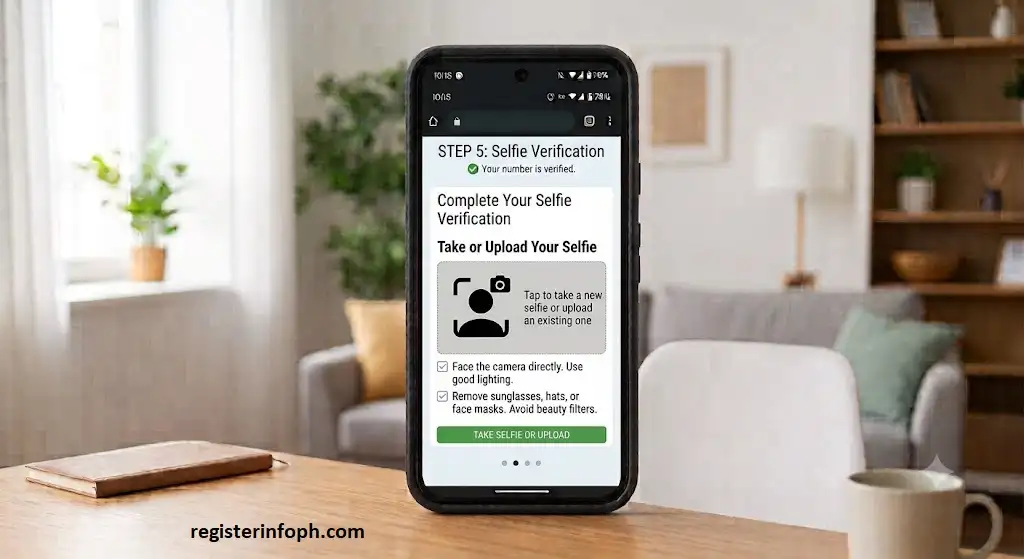
Step 5: Complete the Selfie Verification
You may be asked to upload or capture a selfie for identity verification.
For the best results:
- Face the camera directly.
- Use good lighting.
- Remove sunglasses, hats, or face masks.
- Avoid using beauty filters or edited photos.
The selfie is used only to verify that the person registering matches the submitted identification.
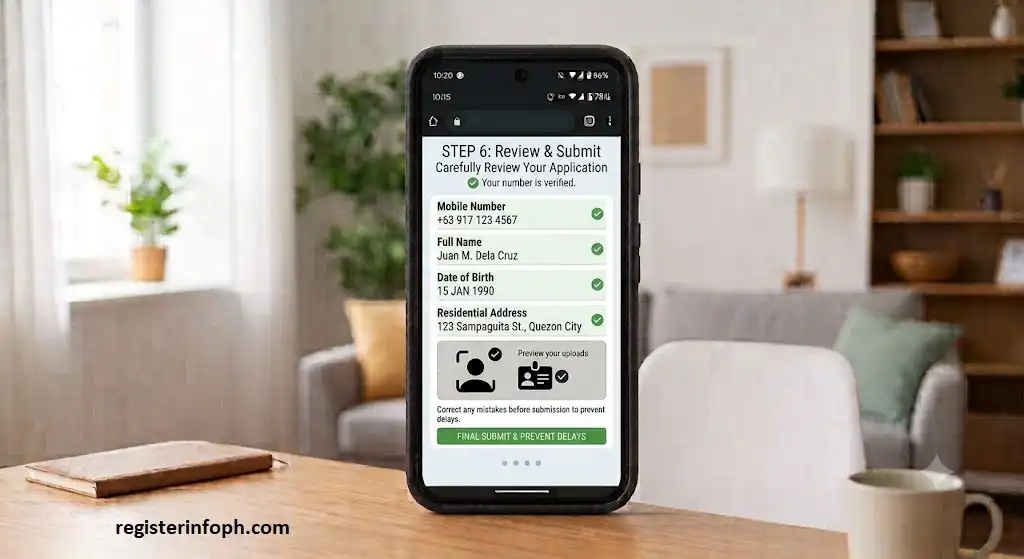
Step 6: Review Your Information
Before submitting your application, carefully review everything you entered.
Check:
- Mobile number
- Name spelling
- Date of birth
- Address
- Uploaded ID
- Selfie image
Correcting mistakes before submission helps prevent delays.
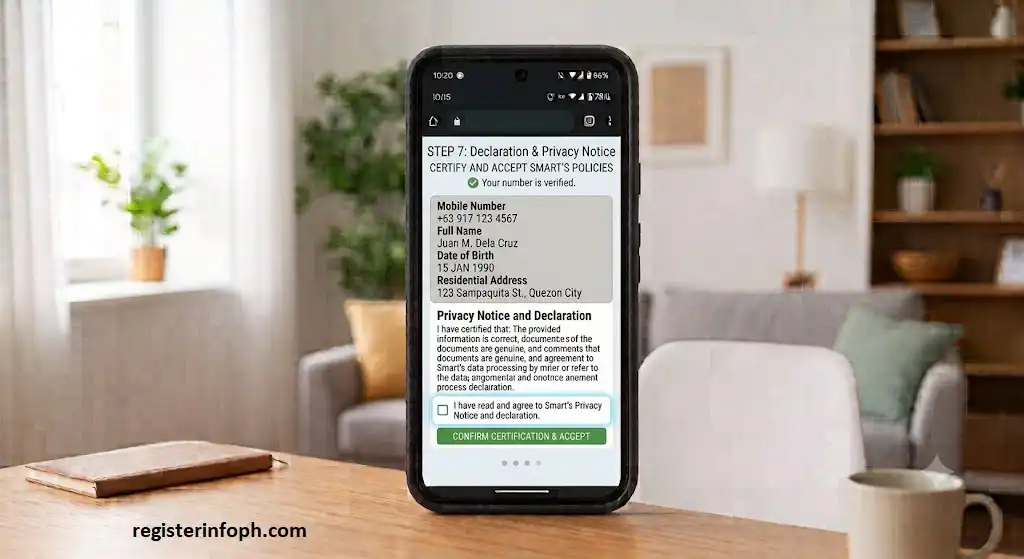
Step 7: Accept the Declaration and Privacy Notice
Read Smart’s Privacy Notice and declaration carefully.
Tick the confirmation box to certify that:
- The information provided is correct.
- The documents submitted are genuine.
- You agree to Smart’s data processing in accordance with applicable laws.
Step 8: Submit Your Registration
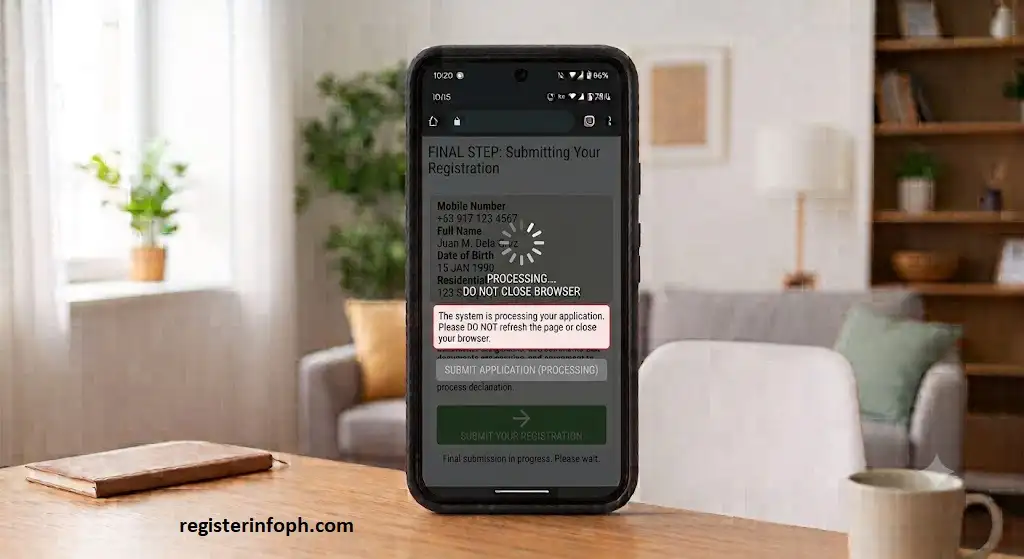
Click the Submit button.
The system will process your application.
Do not refresh the page or close your browser while your registration is being submitted.
Step 9: Save Your Confirmation
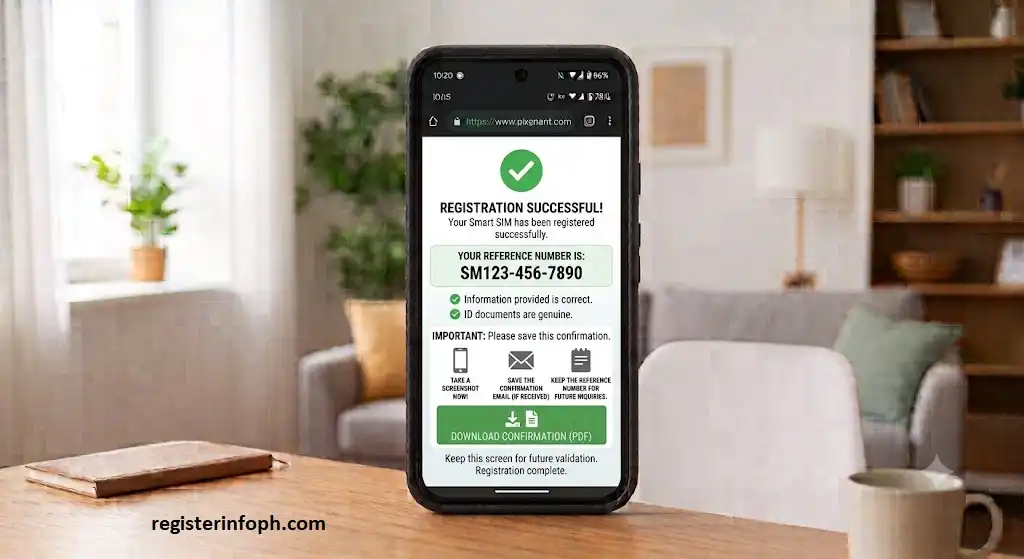
Once registration is successful, Smart will display a confirmation message along with a reference number.
It is recommended that you:
- Take a screenshot.
- Save the confirmation email (if received).
- Keep the reference number for future inquiries.
How to Register Smart Rocket SIM Using the Smart App
Subscribers who prefer using a mobile application can register directly through the official Smart App.
Follow these steps:
- Download and install the latest Smart App.
- Open the application.
- Sign in using your Smart Rocket SIM number.
- Verify your number through the OTP.
- Select SIM Registration.
- Fill in your personal information.
- Upload your government-issued ID.
- Complete the selfie verification.
- Review all details.
- Submit your application.
Smart Rocket SIM Registration for Foreign Nationals
Foreign nationals staying or traveling in the Philippines are also required to register their Smart Rocket SIM.
The registration process is generally similar, but additional information and supporting documents may be required depending on immigration status.
These may include:
- Passport
- Visa or immigration documents
- Proof of address in the Philippines (if applicable)
- Return or onward ticket (for short-term visitors)
- Other documents required under Philippine regulations
Ensure that the information entered matches your travel and immigration records.
Smart Rocket SIM Registration for Minors
Minors can also use a Smart Rocket SIM, but the registration is generally completed by a parent or legal guardian.
The parent or guardian may need to provide:
- Their valid government-issued ID
- The minor’s personal information
- Proof of guardianship when required
The registered adult becomes responsible for the SIM under applicable regulations.
Is Smart Rocket SIM Registration Required?
Yes. Every Smart Rocket SIM must be registered in compliance with the SIM Registration Act (Republic Act No. 11934).
Whether your Rocket SIM is:
- Brand new
- Recently activated
- Used in a smartphone
- Inserted into a pocket Wi-Fi
- Used in a home Wi-Fi device
it must be registered using Smart’s official registration platform.
Failure to complete Smart Rocket SIM registration within the required period may result in your SIM being deactivated.
Why Should You Register Your Smart Rocket SIM?
Besides complying with Philippine law, registering your Smart Rocket SIM provides several important benefits.
1. Continue Using Smart Services
Registration ensures your SIM remains active so you can continue enjoying:
- Mobile data
- Voice calls
- SMS services
- Promo subscriptions
- Smart account services
Without registration, your SIM may eventually become inactive.
2. Protect Your Mobile Number
Registering your SIM links it to your identity, making it easier for Smart to verify account ownership if you need customer support or assistance with account-related concerns.
3. Enhanced Security
SIM registration helps reduce the misuse of anonymous SIM cards for fraudulent or illegal activities. Identity verification adds an extra layer of security for both subscribers and the mobile network.
4. Access Smart Promos
Once your Rocket SIM is registered, you can continue subscribing to eligible Smart prepaid data promos, including available Unlimited Data offers and other prepaid packages supported by your SIM.
5. Receive Customer Support
If you encounter issues with your account, a registered SIM makes it easier for Smart customer support to verify your identity and assist you with eligible account-related requests.
Smart Rocket SIM Registration Requirements
Before beginning the registration process, prepare the required information and documents to avoid interruptions.
You will generally need:
- Your Smart Rocket SIM
- A mobile device with the SIM inserted
- Stable internet connection
- One-Time Password (OTP) sent via SMS
- Personal information
- A valid government-issued ID
- A clear selfie for identity verification
Having everything ready before you begin can make the registration process much faster.
Personal Information You’ll Need
During Smart Rocket SIM registration, you’ll be asked to provide the following personal information.
- Full Name
- Date of Birth
- Gender
- Nationality
- Residential Address
- Mobile Number
- Email Address (if applicable)
Always ensure the information matches the details shown on your identification document.
Accepted Valid IDs
For Smart Rocket SIM registration, Smart accepts a variety of government-issued identification documents:
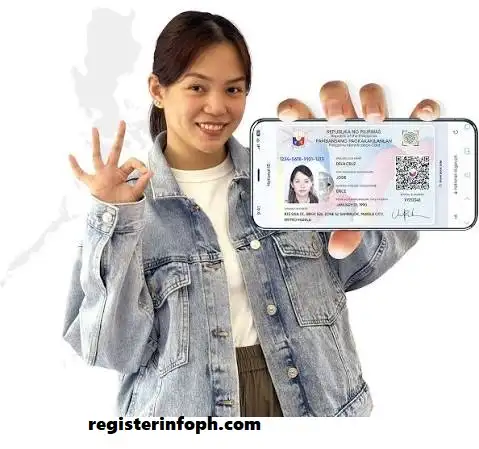
- Philippine National ID (PhilSys ID)
- Passport
- Driver’s License
- Unified Multi-Purpose ID (UMID)
- Social Security System (SSS) ID
- Government Service Insurance System (GSIS) e-Card
- Professional Regulation Commission (PRC) ID
- Postal ID
- Voter’s ID (where accepted)
- Senior Citizen ID
- Overseas Workers Welfare Administration (OWWA) ID
- Person with Disability (PWD) ID
- Bureau of Internal Revenue (TIN) ID (where accepted)
- National Bureau of Investigation (NBI) Clearance (where accepted)
Note: Accepted IDs may change based on Smart’s current registration policies. Always refer to the official Smart SIM Registration Portal for the latest list of accepted identification documents.
What Should You Prepare Before Registering?
Before starting your Smart Rocket SIM registration, prepare the following items to avoid delays.
Ensure Your SIM Is Active
Insert your Smart Rocket SIM into your device and confirm that it can receive SMS messages. You’ll need to receive an OTP during registration.
Check Your Internet Connection
Since registration is completed online, make sure you have a stable Wi-Fi or mobile data connection.
Take a Clear Photo of Your ID
Before starting, capture a high-quality image of your valid ID.
Your photo should:
- Be well-lit
- Show the entire ID
- Have readable text
- Be free from glare or blur
Prepare for the Selfie Verification
During registration, Smart may ask you to upload or capture a selfie.
For the best results:
- Face the camera directly.
- Remove sunglasses or face coverings.
- Use good lighting.
- Avoid edited or filtered photos.
Keep Your SIM Packaging (Optional but Helpful)
Although it isn’t always required, keeping your SIM packaging can be useful because it contains information such as your mobile number and SIM details.
Can You Register Without a Valid ID?
No. A valid government-issued identification document is generally required to verify your identity during Smart Rocket SIM registration.
If you don’t have an acceptable ID, you should obtain one before attempting to register your SIM.
Is Smart Rocket SIM Registration Free?
Yes. Smart does not charge subscribers for registering their SIM cards through its official registration channels.
Be cautious of individuals or websites asking for payment to complete your SIM registration, as official registration is provided at no cost.
Registration Through an Authorized Representative
If the subscriber is unable to register personally because of age, disability, illness, or other valid circumstances, an authorized representative may complete the registration on their behalf.
The representative may be required to provide:
- Their own valid ID
- Authorization documents (if applicable)
- The subscriber’s required identification
- Accurate personal information of the SIM owner
Smart may request additional verification depending on the situation.
Can Existing Smart Rocket SIM Users Register?
Yes.
If you already own and actively use a Smart Rocket SIM that has not yet been registered, you should complete the registration through the official Smart registration channels.
Existing subscribers must also comply with the SIM Registration Act to continue using their mobile services.
How Long Does Registration Take?
Most Smart Rocket SIM registration applications can be completed in 5 to 10 minutes.
The overall processing time depends on factors such as:
- Internet connection speed
- Image quality of the uploaded ID
- Successful OTP verification
- Accuracy of the submitted information
If additional verification is needed, confirmation may take longer.
Tips for a Smooth Registration
To make your registration as easy as possible, keep these tips in mind:
Common Mistakes to Avoid During Registration
Many registration issues happen because of simple mistakes. Avoid the following:
Taking a few extra minutes to review your application can help prevent unnecessary delays or rejected submissions.
How to Check if Your Smart Rocket SIM Is Registered
After completing your Smart Rocket SIM registration, it’s a good idea to verify that your registration was successful. This ensures your SIM remains active and fully compliant with the Philippine SIM Registration Act.
You can confirm your registration using any of the following methods.
1. Check Your Registration Confirmation
After submitting your application, Smart typically displays a confirmation message along with a reference number. If you received this confirmation, save it by taking a screenshot or writing down the reference number for future reference.
2. Check Your SMS Messages
Smart may send a confirmation text message after your registration has been successfully processed. Keep this message as proof of registration.
3. Log In to the Smart App
If you completed your registration through the Smart App, you can sign in to your account and check your SIM details. Depending on the app version, your registration status may also be displayed.
4. Contact Smart Customer Support
If you’re unsure whether your registration was successful, contact Smart Customer Support through its official support channels. Be prepared to provide your mobile number and reference number, if available, to help verify your registration.
What Happens If You Don’t Register Your Smart Rocket SIM?
The SIM Registration Act requires all SIM cards in the Philippines to be registered. If you fail to register your Smart Rocket SIM within the period required by law, your SIM may be deactivated.
A deactivated SIM may no longer allow you to:
- Make or receive calls
- Send or receive text messages
- Use mobile data
- Subscribe to promos
- Access other Smart mobile services
To avoid service interruptions, complete your registration as soon as possible using Smart’s official registration channels.
Common Smart Rocket SIM Registration Problems and Solutions
Although the registration process is straightforward, some users may encounter issues. Here are common problems and practical solutions.
OTP Not Received
Possible Causes
- Weak mobile signal
- Full SMS inbox
- Incorrect mobile number entered
- Temporary network delay
Solution
- Check your signal strength.
- Confirm you entered the correct mobile number.
- Wait a few minutes and request a new OTP.
- Restart your device if necessary.
Blurry ID Upload
Possible Causes
- Poor lighting
- Camera out of focus
- Cropped document
Solution
- Take the photo in a bright area.
- Place the ID on a flat surface.
- Capture the entire document clearly.
- Ensure all text is readable.
Selfie Verification Failed
Possible Causes
- Face partially covered
- Poor lighting
- Filters applied
Solution
- Remove sunglasses, masks, or hats.
- Face the camera directly.
- Use natural lighting.
- Avoid edited or filtered images.
Website Not Loading
Possible Causes
- Slow internet connection
- Browser issues
- Temporary server traffic
Solution
- Refresh the page after a few minutes.
- Switch to another browser.
- Clear your browser cache.
- Try using the Smart App instead.
Incorrect Personal Information
If you realize you’ve entered incorrect information before submitting your application, correct it immediately.
If you’ve already submitted the form, contact Smart Customer Support for guidance on any available correction process.
Smart Rocket SIM vs Smart Prepaid SIM
Many users wonder whether a Smart Rocket SIM is different from a regular Smart Prepaid SIM. Both use the Smart mobile network, but they are designed for slightly different purposes.
| Feature | Smart Rocket SIM | Smart Prepaid SIM |
|---|---|---|
| Primary Purpose | Mobile internet | Calls, texts, and data |
| Network | Smart LTE / 5G | Smart LTE / 5G |
| Unlimited Data Offers | Available on selected promos | Available on selected promos, depending on eligibility |
| Best For | Heavy internet users, pocket Wi-Fi, home Wi-Fi | Everyday mobile use |
| SIM Registration Required | Yes | Yes |
Choose the SIM that best matches how you plan to use your mobile service.
Tips to Keep Your Smart Rocket SIM Secure
After registering your SIM, protect your personal information by following these security tips:
- Never share your One-Time Password (OTP).
- Keep your Smart account password secure.
- Register only through official Smart channels.
- Avoid clicking suspicious links claiming to offer SIM registration.
- Do not share photos of your government-issued ID with unknown individuals.
- Report any suspicious activity to Smart immediately.
These simple precautions can help reduce the risk of scams and unauthorized access.
Official Resources
For the latest announcements, registration updates, and support, refer to the following official Smart resources:
- Smart SIM Registration Portal: https://simreg.smart.com.ph/
- Smart Communications: https://smart.com.ph/
- Smart Help Center: https://help.smart.com.ph/
Conclusion
Completing your Smart Rocket SIM registration is an important step toward complying with the Philippine SIM Registration Act and ensuring uninterrupted access to Smart’s mobile services. By registering through the official Smart SIM Registration Portal or the Smart App, you can continue enjoying mobile data, calls, texts, and eligible prepaid promos while helping protect your account through identity verification.
Before submitting your application, make sure your personal information is accurate, your government-issued ID is clear, and your selfie meets the verification requirements. After registration, keep your confirmation or reference number for future reference.
Always use official Smart registration channels and avoid sharing your OTP or personal information with unauthorized individuals to keep your account secure.
Frequently Asked Questions (FAQs)
Explore our latest posts to discover more guides on SIM registration, government services, and online portals.